Thursday, 11 September 2014

How to fold a paper crane

This year one of my goals is to fold 1000 paper cranes for my husband Eugene. According to Japanese legend if you fold 1000 origami cranes you will be granted a wish. This legend was made popular by Sadako Sasaki who was 2 years old when she was exposed to radiation from the atomic bomb that dropped in Hiroshima during WWII (6 August 1945). The crane has now become an international symbol of peace. So today Im going to teach you how to fold this very easy origami crane.


Start with a square piece of paper. You can get a perfect square from any piece
of paper by folding it in half and cutting off the extras.

Add caption

Fold the square in half to make a triangle.


Fold the triangle in half again to crease it.


Now this is a kind of tricky part. You want to bring the creased/ folded triangle back and open it so you can  fold it straight down and you will get a diamond/ square. The next few pictures show that move in a series- sorry its hard to take photos and fold at the same time! 


So thats what it should look like when you fold it down.


Flip over and do the same thing on the other side.


Both sides are now folded.


Now you want to make a sort of kite shape by folding one side of the paper to the centre. Notice its only one flap, not both.


Do the same on the other side- The side on the right is a bit crooked but thats OK.


Now flip it over and do the other side- folding towards the centre.


Now at the top theres a little triangle- Bend it forward and backwards to crease it. This is going to help us in our next step.


Open one side of the kite shape. This is the other kinda tricky part. You want to lift from the bottom and bring it up towards our little triangle and fold the outsides in so it makes a long diamond.

Going up towards our small triangle.


This is the folding in action. 


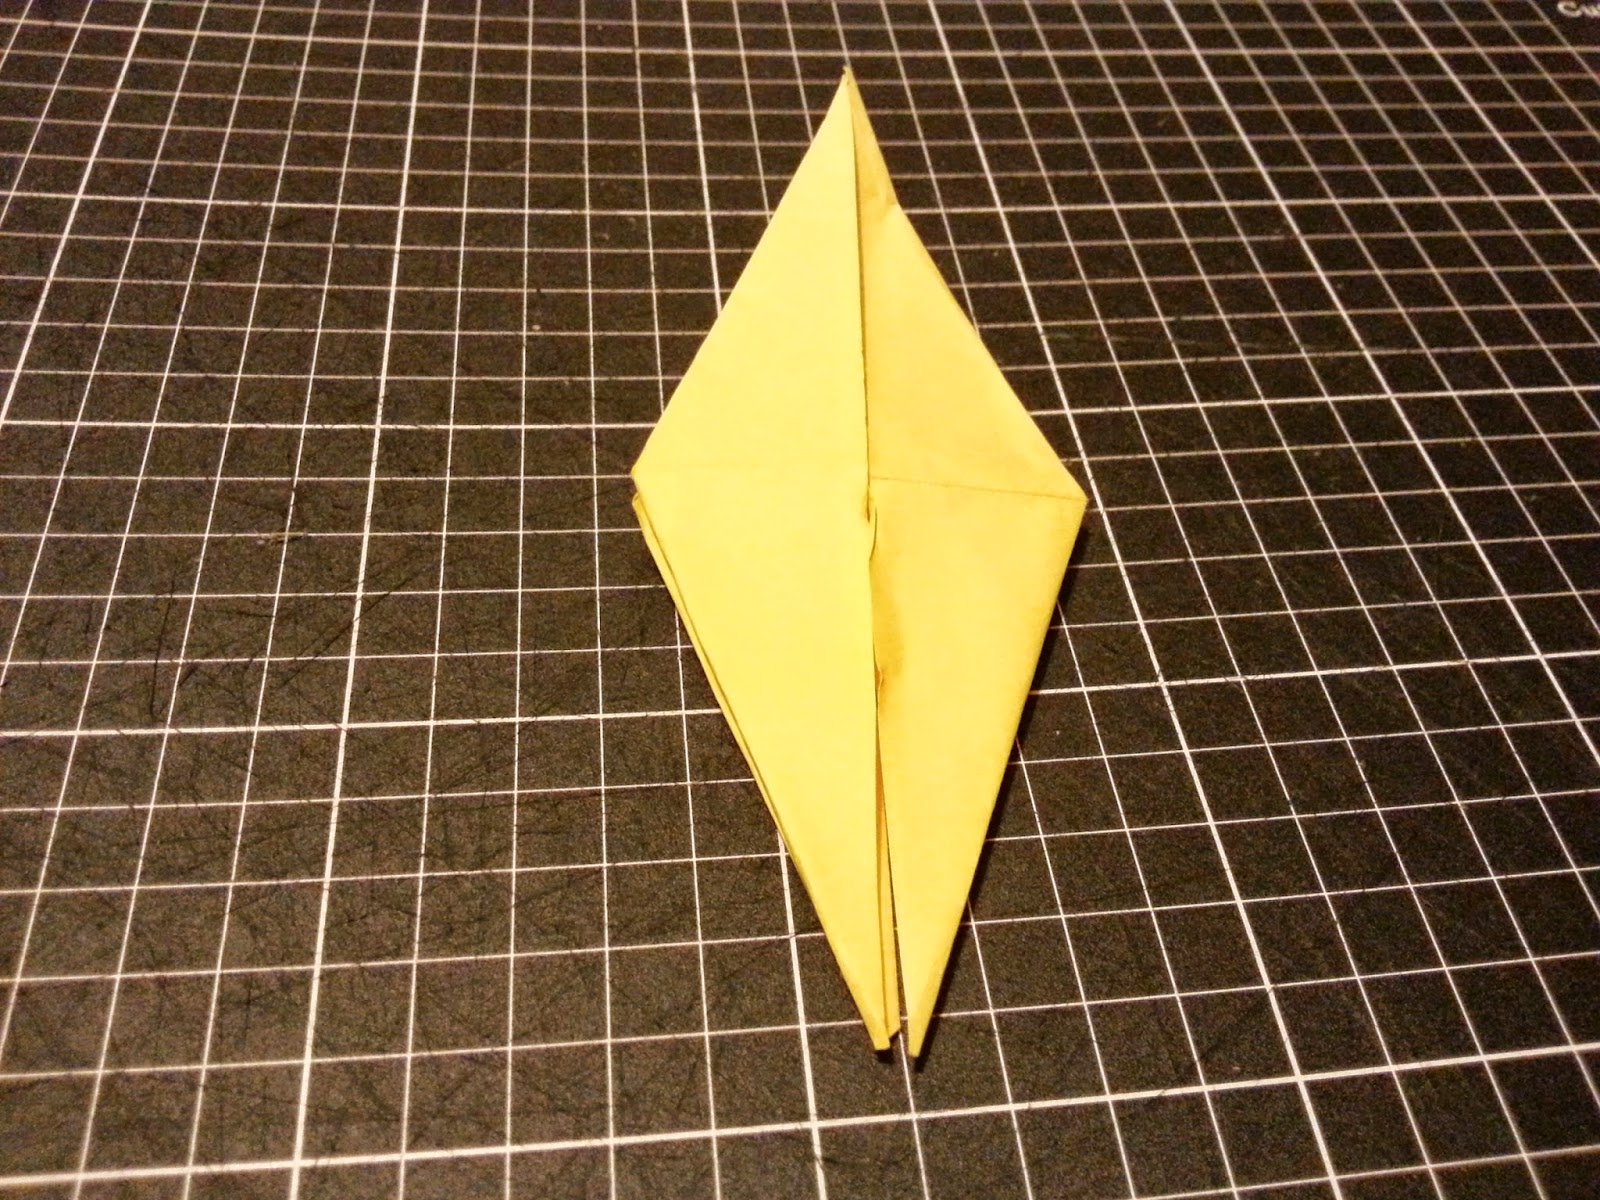
It should look like this long diamond. Now flip over and do the other side the same.


On one side theres a little triangle between the flaps.


You want to fold towards the centre again (Kite) and the little triangle between the flaps will be at the top (Thats the body).


Now you want to pull the flaps up gently sideways to create the head and tail.


This is a side view of the process- pull up and fold to make it stand out.


Now do the same process on the other side.


You can fold down one side to make the birds head and beak. 


You can pull out the wings to the sides and this will puff out the body.


Use and paper you can find and try this out. 


This is my collection so far for my thousand cranes but Ive decided that the big ones are too big and the little ones look better. 

TO MAKE A ORIGAMI CRAIN CHAIN:

You need- needle, thread, cranes

Put your thread through the needle eye and tie your thread together at its ends. It doesn't matter what colour the thread is so use whatever random colour is sitting in your cupboard. Put the needle through the bottom of a crane and carefully pull the needle through the body and stack your cranes on top of each other. I find mine looks better without spreading the wings. Some people like to put beads between the cranes but you don't have to! Have fun! I hope you can share your cranes with me.


Thursday, 28 August 2014

Superheroes and Villains 21st birthday


Superheroes and Villains 21st birthday party

This year I turned 21. Ive always loved comics since my Dad let me read from his large collection since I was a kid. So I decided to make my theme 'Superheroes and Villains'. My mum and I did a lot of organizing because I had a budget to keep to. It was a great night and everyone really loved the decorations. 

I went as Storm from the Xmen and my husband was Wolverine. I found how to make his claws from youtube ( https://www.youtube.com/watch?v=R2XWih-EWM4 )
Most people made a really great effort to dress up so I was really happy with how everything ended up.


After I cut them out I painted them with silver face paint from the $2 shop- I couldn't find any silver paint that looked metallic. And it was only being used for one night!

We also made a lot of props because I was adamant about having a wall for photo opportunities. Some of the props were speech signs although I made a mistake of putting them all the same way. There were Superman sunglasses, Wonderwoman tiara and Thor's hammer Mjolnir. We hot glued them to chopsticks for a cheap solution for the prop sticks and it worked great. 


For the comic wall I scanned my comic collection and printed them out. Then we stuck them to a wall with blu-tack. I decided to go with a more brick pattern rather than have them in a block pattern right next to each other.


It was simple but it looked amazing. Im also a fan of manga so I went through a few chapters of Naruto, Bleach, Shingeki No Kyojin, Fairy Tale and One Piece. I just printed out my favourite pages and sellotaped them together for my table runners. If I could change it I would have made them A5 rather than A4 because they were quite large. It looked much better on the black table cloths rather than the purple.


We also painted some of our favourite characters. Bruce Timm is an awesome artist. 


Above the bar we cut out some logos and blu-tacked them on.

I created a 21 out of black and white photos of me. And green lantern is supposed to be spelling out  my name with his ring.


The walls were really crappy and it had paint chipped away from it everywhere but it didn't really look so bad in the dark. My cousin is an amazing cake maker and decorater in Kalgoorlie, Australia. She owns and runs the business Crumby and she made a special treat for me and sent it over. I asked for a Storm figurine and my goodness- did she deliver!!


Crumbys special package.

My amazing Storm is a little bit broken!

The people who had to open the package to check it werent very careful and broke a finger, foot, hair and the top of her boot.

Amazing fondant work. Hand crafted by Crumby.


Also with the cake decorating we made cupcake toppers by printing out images and cut them into circles and stuck them together with a toothpick in the middle. You cant see them too well in the images because I didnt use a flash but I wanted to make it a superhero city. We also wrapped up boxes we got from paknsave in black paper and stuck white stickers on them to look like city buildings. Also behind the buildings my sister and her husband collaged a wall of my laminated pictures and stuck them with blu-tack.


We had a great time and I think we saved a lot of money with the decorations. All it took was time and organization. If I get photos from other people with cameras I'll update the post but these are just all from my phone.